
Tutorial - Timelapse Photography
Preparation
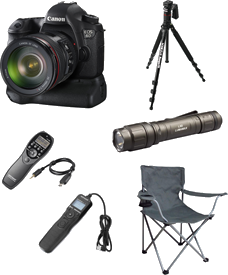
Equipment List
- DSLR Camera with fully-charged battery
- Intervalometer
- Sturdy Tripod
- Flashlight (for time spans that will begin before sunrise, or end after sunset).
- Folding chair (for long shoots with no other resting place).
Do the Math
You'll need to calculate the values for your intervalometer before you head out, based on the time span you want to record over, and the length of the video you want to end up with. You can do the calculation yourself, using the equations below, or use our handy calculator widget.
    Event time span in real time: T secs
    Timelapse running time: V secs
    Timelapse framerate: R frames/sec
    Intervalometer values:	Self-timer delay D = Usually 1 sec is sufficient, unless you will be in the shot.
				Exposure Time E = Usually overridden by the camera, unless shooting in BULB mode.
				Exposure Count N = R * V
				Interval I =  (T / N) - E
Example
    Event time span in real time: 20 minutes = 1200 secs
    Timelapse running time: 6 secs
    Timelapse framerate: 20 frames/sec
    Intervalometer values:	Self-timer delay D = 1 sec
				Exposure Time E = 0 (1/250 sec set on camera)
				Exposure count N = 6 * 20 = 120
				Interval I = (1200 / 120) - 0 = 10 secs
Note: Some intervalometers have an exposure count N1, and a second cycle count value N2 for how many times the whole cycle is repeated. In this case, set N2 to 1. If N is greater than the maximum value of N1, set N1 * N2 = N, and set D to the same value as I. Example: if N = 160, set N1 to 80 and N2 to 2.
Prepare your camera. You'll need to have everything set manually, so that no settings change from shot to shot. This includes white balance, and any other settings that you habitually leave on automatic. Unless you will be using single frames for other purposes, you can shoot at a lower resolution (1920 pixels wide max.) Shoot in RAW if you might want to make changes in Lightroom to all frames globally (for example, bringing up the foreground shadows; if you think your shots will be fine straight off the camera, you can save room by shooting in JPEG only.
On Location
Arrive well before the time that you want to start shooting. If it's a popular spot, make sure you're early enough to secure parking and find the right place to set up. If you're next to a path, set your tripod facing away from the pathway so that unexpected passersby don't get in any of your shots.
Focus the lens on your subject, and then switch to manual focus. Ensure that any image stabilization is turned off. Set your camera settings (White balance, ISO, aperture, shutter speed, etc.) and take a single shot manually. If the lighting conditions will vary during your time span, try to estimate what settings will give good exposure at the mid point. For example, if shooting a sunset, overexpose the first shot so that by the time the sun is halfway down, the exposure will be about right, and when it has finally set, the shot will be underexposed. A good guideline for a 20 minute sunset is 1 stop at either end.
Settle yourself comfortably, press the "play" button on your intervalometer, and enjoy the show!
Lightroom Process (optional)
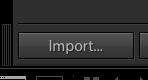
If you want to make adjustments to your photos before creating your timelapse, you can easily do this using Lightroom. Import all the photos
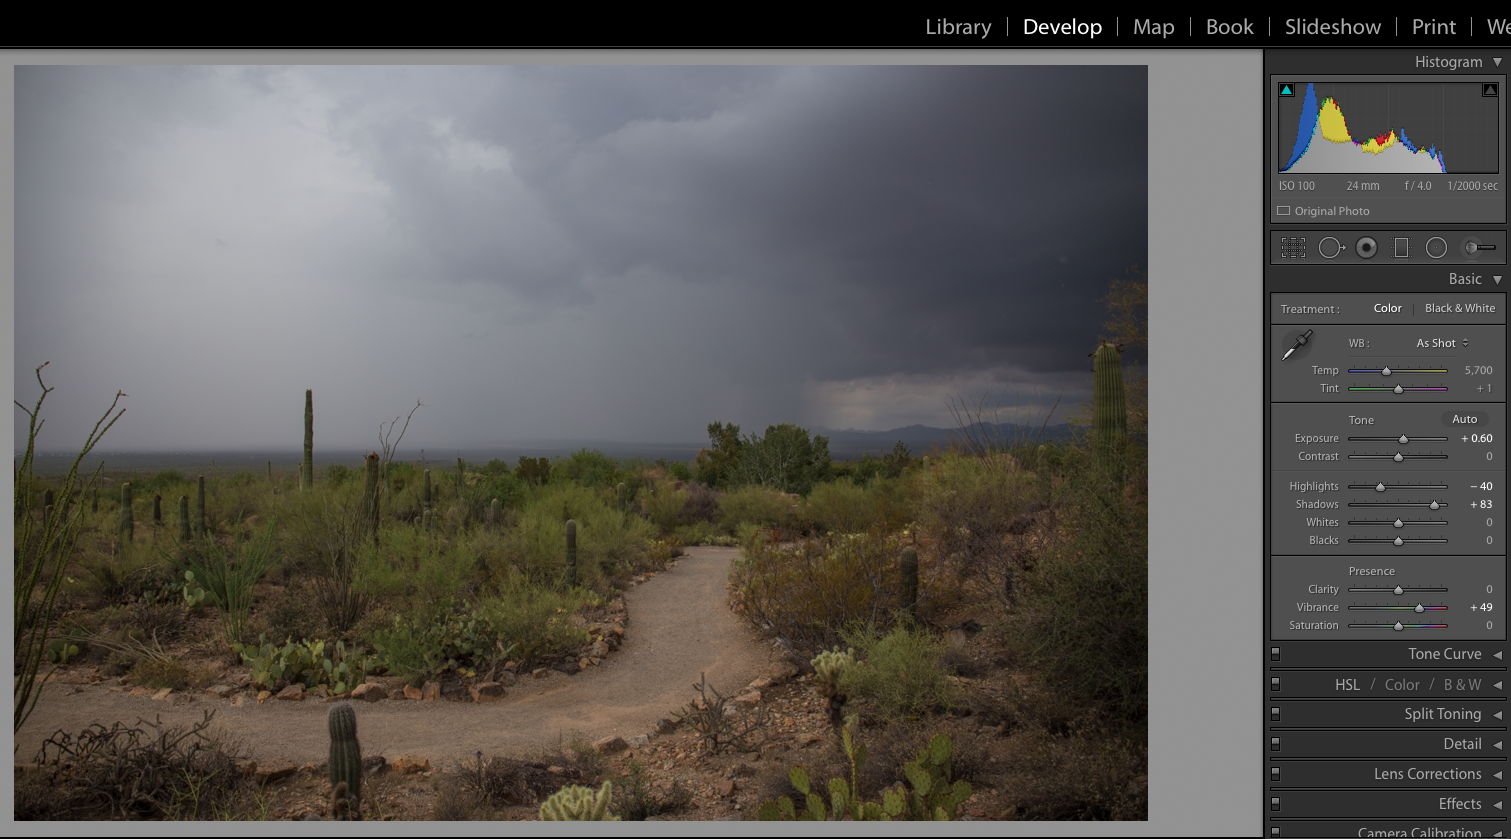
Then make your adjustments to the first one - for example, bringing up shadows, softening highlights, or cropping the frame.
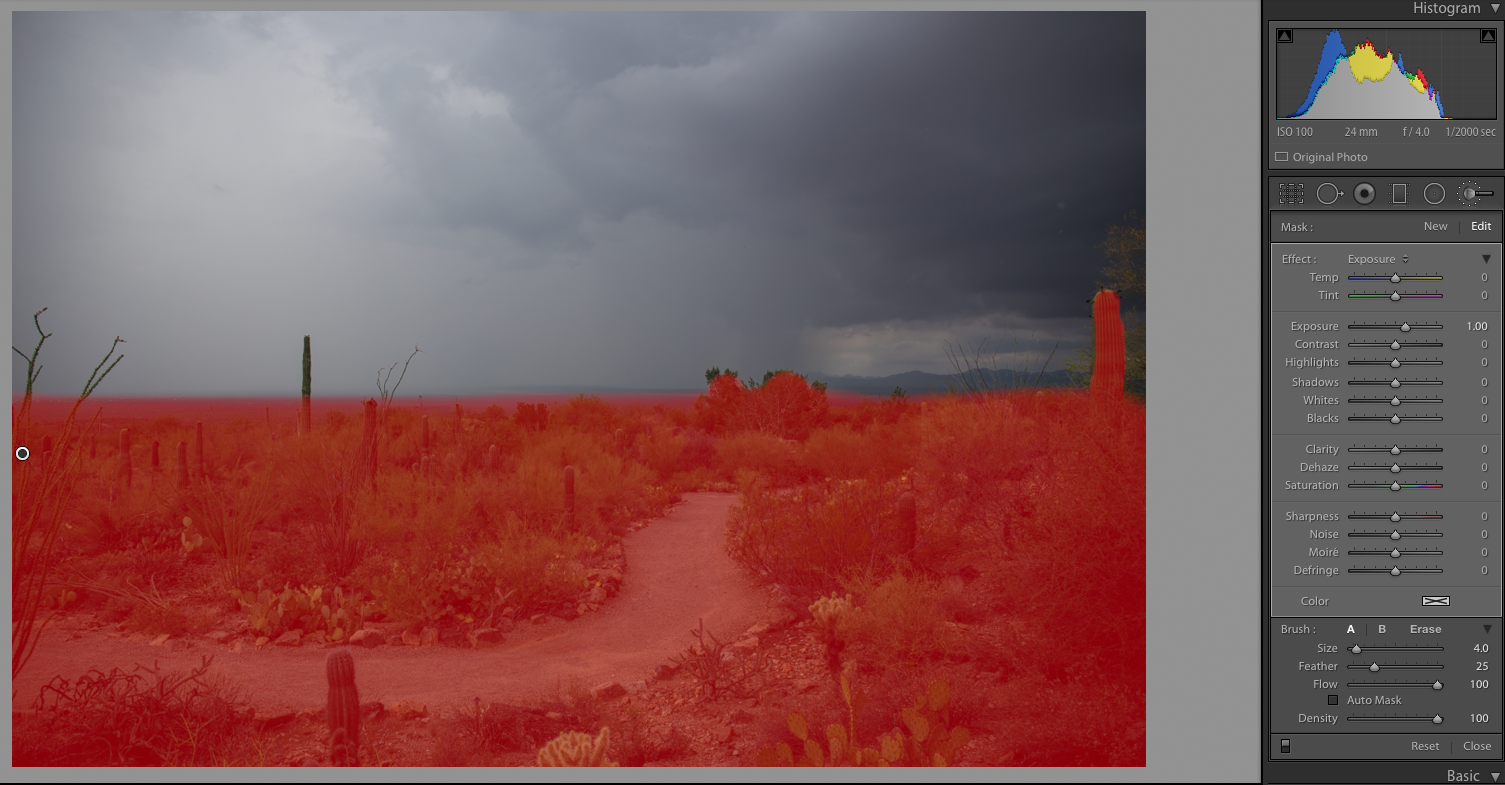
Because all of your photos were shot without moving the camera, you can even use a mask to bring up shadows in just a portion of the photo.
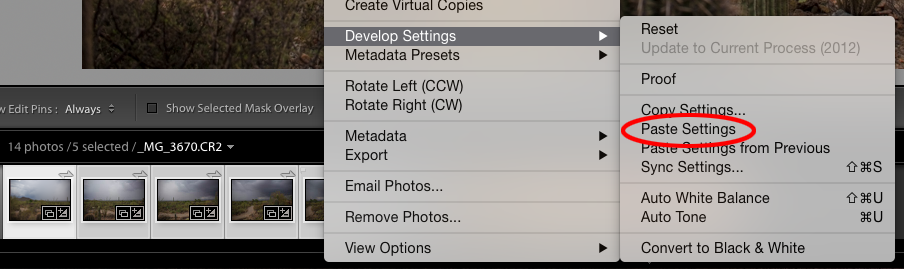
When you're done, you can right click on the photo and 'Copy Develop Settings'

Make sure you select the checkboxes for all the settings you want to copy, as crop settings are typically unselected by default).

Then select all the other photos and 'Paste Develop Settings'
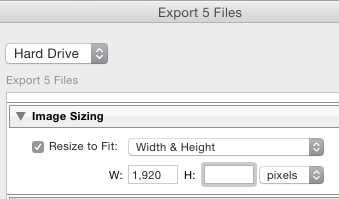
Finally, export all photos as JPEGs, using the export settings to reduce the resolution to 1920 x 1080 if necessary.
Producing the Video
Offload your photos onto your computer. Make sure they're numbered sequentially. If you shot RAW files, there's no need to convert to JPEG - the following steps will work equally well for RAW and JPEG file formats.
Photoshop Process
The following screenshots use Photoshop CC, but work equally well with CS5 or CS6 versions.
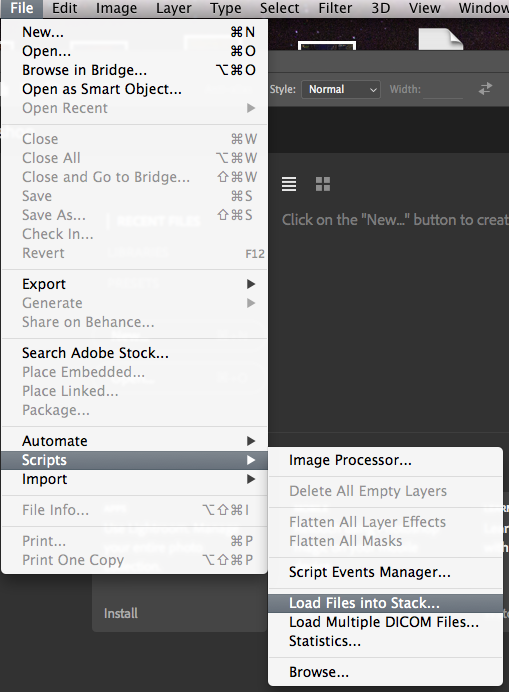
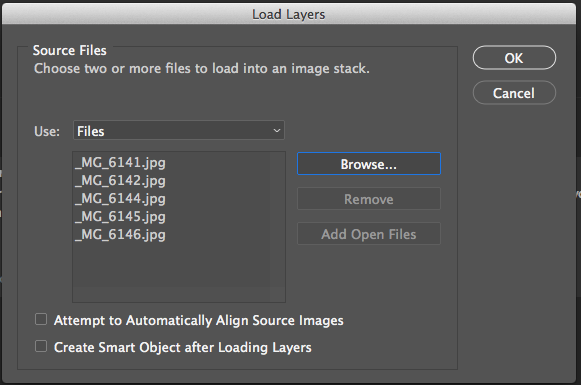
Use the 'Load Files into Stack' script to place all your shots into layers in a single Photoshop document. If you have high res images, or a very large number, this can take some considerable time. You may want to close any other programs running on your computer.
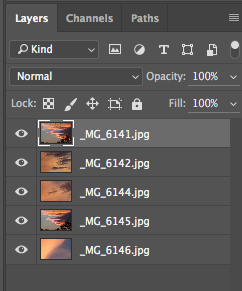
After your files have been loaded in, you should see them listed in the 'Layers' window, with their filenames as the layer names. At this point, you should check that everything is in the correct order, with the first image in the timeline at the bottom. You can drag and drop layers for small changes, or select them all and use 'Layer / Arrange / Reverse' if they're in reverse order (very common).
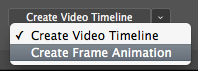
You'll need to open the Timeline (CC) or Animation (CS5/CS6) window from the 'Window' menu. It will appear at the bottom of the screen.

Next you'll need to create a Frame Animation. In CC, select 'Create Frame Animation' from the drop down in the middle of the timeline window, and then click on it. (In CS5/CS6, you'll need to 'Switch to Frame Animation' using the menu icon in the top right corner of the animation window.)
Using the menu icon in the top right corner of the timeline or animation window, choose 'Make Frames From Layers'. This will load all your layers as frames automatically.
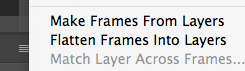
And there they are!

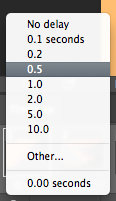
Now you can select the delay for each frame, which will be the reciprocal of the framerate you chose for your timelapse. For example, if you decided upon 20 frames/sec., you would choose 0.05 here. (If you click on 'Other', you can type in your own value.) Selecting all the frames allows you to set the same delay for them in one step. You might want to select a longer delay (1-2 seconds) for the last frame, to allow for a pause at the end to appreciate your work!
You can also set how many times the animation will loop (default Once). This will have no effect on the rendered video, but will affect the preview animation, or if saved as a GIF. I like to select 'Forever' so that it loops endlessly when I review it before rendering.

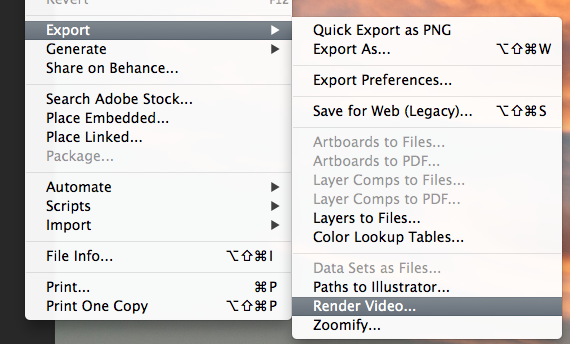
Use the playback controls in the timeline/animation window to check out your work. Once you're happy with it, you're ready to create the video file. The 'File / Export / Render Video...' menu option will do this for you.
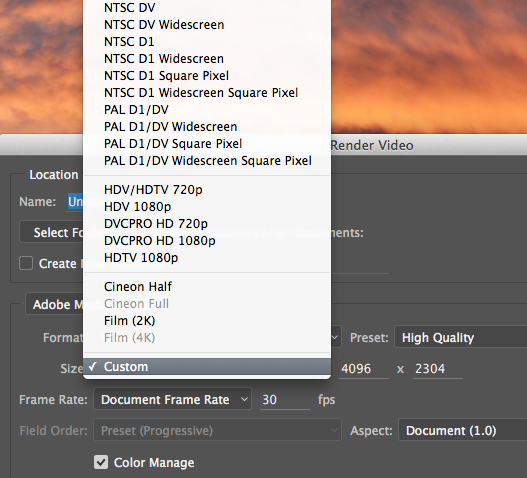
The video rendering window offers many options, most of which can be left as the default. Make sure your document frame rate matches the frame rate you chose initially. If you shot in high res, here's the moment when you can reduce down to a more typical resolution, such as HDTV 1080p. Failing to remember to do this will result in slow rendering, and a gigantic file that won't play well on most computers!
Now you have your timelapse movie, ready to be enjoyed and shared with your friends!
© ![Reflected Wisdom [Logo]](/images/graphics/RWLogo_200.png)